What Are Cones and How Can We Find Them in Our Everyday Life? - Lesson Plan
-

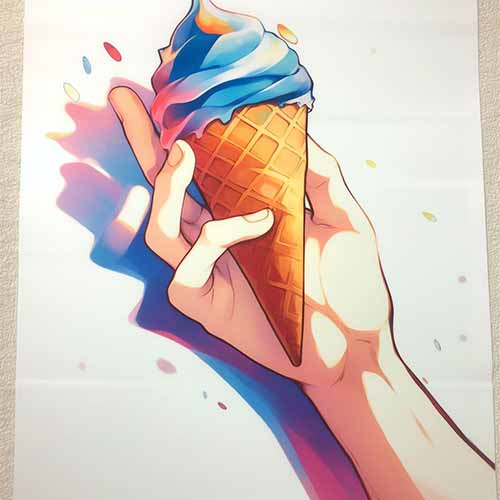
A hand holding an ice cream cone - By BING -
Cones are one of the basic 3D shapes children learn about in math. They have a circular base and a curved surface that narrows to a point. You can find cones in many objects, such as ice cream cones, party hats, traffic cones, etc.
This lesson plan will help you teach pre-k, kindergarten, and first graders about cones and recognizing them among other 3D shapes, such as cubes, cylinders, and spheres.
Why Cone Lesson Plan Is Great for Kids
-
This lesson plan is designed to help kids develop their spatial awareness, geometry skills, and vocabulary. By watching the video and doing the activities and games, kids will be able to:
- Identify cones and their properties
- Compare and contrast cones with other 3D shapes
- Find examples of cones in real-life
- Use words like base, vertex, curved, and flat to describe cones and other 3D shapes
-
Grade Level: Pre-K | Kindergarten | Grade 1
Duration: 20 - 30 minutes
Objectives: By the end of this lesson, students will be able to:
- Define what a cone is
- Identify cones in different orientations and sizes
- Sort objects into cones and non-cones
- Name some everyday objects that are shaped like cones
This lesson plan is flexible and adaptable to different classroom settings and situations. You can adjust the duration, difficulty, and number of activities according to your students' needs and interests. You can also use different materials and resources that are available to you.
-
Previous knowledge
Before attending this lesson, students should know:
- The names of some 2D shapes, such as circles, squares, triangles, etc.
- The names of some 3D shapes, such as cubes, cylinders, spheres, etc.
- The difference between 2D and 3D shapes
Materials
For this lesson, you will need:
- A computer or a projector to show the video from mathskills4kids.com
- A worksheet with pictures of cones and non-cones for each student (you can download it from here: https://mathskills4kids.com/free-printable-3d-shapes-worksheets-for-kindergarten-pdf)
- A set of objects that are shaped like cones and non-cones for each group of students (for example: ice cream cones, party hats, traffic cones, balls, cans, boxes, etc.)
- A chart paper or a whiteboard to write the objectives and the key words of the lesson
READ THE PROCEDURE
-
Introduce the lesson
To introduce the lesson, you can:
- Ask the students if they know what a cone is and if they can name some objects that are shaped like cones
- Show them the video from mathskills4kids.com (https://youtu.be/-C4OcyZmlFg) and pause it at different points to ask questions and check their understanding
- Review the definition and the properties of a cone with the students and write them on the chart paper or the whiteboard
-
Warm-up
To warm up the students' brains, you can:
- Ask them to look around the classroom or the school and find some examples of cones
- Ask them to draw a cone on their notebooks or on a piece of paper
- Ask them to share their drawings with their classmates and explain why they think their drawing is a cone
-
Introducing the concept
To help the students understand the concept of a cone better, you can:
- Show them some objects that are shaped like cones and non-cones and ask them to sort them into two groups
- Ask them to explain why they put each object in each group and what features they used to decide
- Ask them to use words like base, vertex, curved, and flat to describe the objects in each group
-
Activities and games
To reinforce the concept of a cone and make the lesson more fun and interactive, you can:
- Give each student a worksheet with pictures of cones and non-cones and ask them to circle the cones and cross out the non-cones
- Give each group of students a set of objects that are shaped like cones and non-cones and ask them to play a game of "I Spy" with them (for example: "I spy something that has a circular base and a pointy top")
- Give each group of students some playdough or clay and ask them to make their own cones and other 3D shapes
-
Group Sharing
To encourage the students to share their learning with others, you can:
- Ask each group of students to present their playdough or clay creations to the class and explain what shapes they made and why
- Ask each student to show their worksheet to their classmates and explain how they identified the cones and non-cones
- Ask each student to name one thing they learned about cones today
-
Conclusion
To wrap up the lesson, you can:
- Review the objectives and the key words of the lesson with the students and ask them to repeat them after you
- Ask the students to give you a thumbs up, a thumbs down, or a thumbs sideways to show how well they understood the lesson
- Ask the students to think of one question they still have about cones or one thing they want to learn more about
✨ Assessment
To assess the students' learning, you can:
- Give each student a quiz with multiple choice or true/false questions about cones and other 3D shapes
- Give each student a feedback form with smiley faces or stars to rate their enjoyment and confidence in the lesson
Collect the students' worksheets, playdough or clay creations, and quizzes and check them for accuracy and completeness
🌈 Have fun teaching and learning about solid shapes! Remember, you're doing an amazing job, teachers! 🎉 For more math videos and resources, visit our website at https://mathskills4kids.com/. 🌟
Please CLICK THE SHARE BUTTON to allow others to benefit from this content!
