Teaching Positions to Pre-K and Kindergarten with MathSkills4Kids Videos | Lesson Plans
-

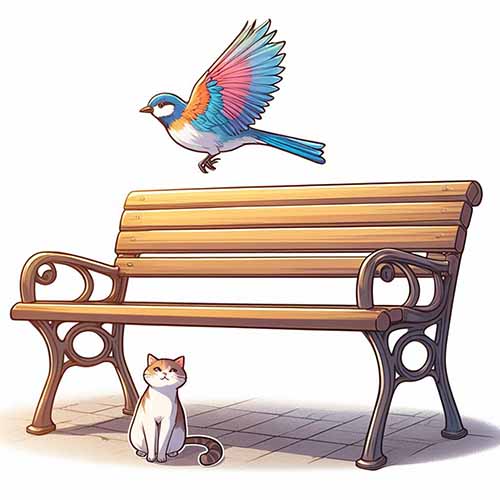
Position of the animals in relation to a bench. - By BING -
Do you want to help your students develop their spatial awareness and mathematical reasoning skills? Do you want to make your math lessons more fun and engaging? If you answered yes, you will love using MathSkills4Kids videos to teach and practice positions in your pre-K and kindergarten classes!
MathSkills4Kids.com's colorful, animated, and interactive videos on positions will drive your students into engaging learning. This page will focus on how to use our videos to teach positions such as above, below, outside, inside, top, bottom, left, middle, and right.

Introduction: Why positions are essential for math development and how MathSkills4Kids videos can support your teaching goals
Positions are essential for math development because they help students understand the relationship between objects in space. They also prepare them for more advanced concepts such as geometry, symmetry, transformations, and coordinates.
MathSkills4Kids videos can support your teaching goals by providing clear explanations, examples, and practice questions on positions. You can use them as a whole-class activity, a small-group activity, or an individual activity. You can also assign them as homework or extra practice.
Here are some lesson plans on how to use MathSkills4Kids videos to teach positions to your pre-K and kindergarten students. Each lesson plan includes a web link and a YouTube video link for the corresponding video. You can also find more videos on their website or YouTube channel.
-
POSITIONS
-
BROWSE THE LESSON PLANS
-


-
Above / Below: How to prepare, present, and practice the concept with MathSkills4Kids video
In this lesson, you will teach your students how to identify and describe the position of objects as above or below other objects. You will need a projector or a smart board to show the video "Above and Below" to your class.
- Prepare: Before the lesson, review the meaning of above and below with your students. You can use some natural objects or pictures to demonstrate the concept. For example, you can show them a book above a table and a book below a table. Ask them to point out which object is above and which object is below. You can also ask them to use the words ‘above’ and ‘below’ in sentences. For example, "The sun is above the clouds" or "The fish is below the water."
- Present: During the lesson, play the video "Above and Below" to your class. The video will introduce the concepts above and below with examples and questions. Pause the video when necessary to check your students' understanding and ask them to repeat after the narrator. You can also ask them some questions based on the video. For example, "What is above the tree?" or "What is below the bridge?"
- Practice: After the lesson, give your students some practice worksheets on “above and below.” You can find some free worksheets on this page mathskills4kids.com/preschool-position-worksheets or create your own. You can also play some games with your students to reinforce the concept. For example, you can play "Simon Says" with above and below commands. For example, "Simon says touch something above your head" or "Simon says touch something below your chair."
READ FURTHER
-
Outside / Inside: How to prepare, present, and practice the concept
In this lesson, you will teach your students how to identify and describe the position of objects as outside or inside other objects. You will need a projector or a smart board to show the video "Outside and Inside" to your class.
- Prepare: Before the lesson, review the meaning of outside and inside with your students. You can use some real objects or pictures to demonstrate the concept. For example, you can show them a ball outside a box and a ball inside a box. Ask them to point out which object is outside and which object is inside. You can also ask them to use the words outside and inside in sentences. For example, "The dog is outside the house" or "The cat is inside the basket."
- Present: During the lesson, play the video "Outside and Inside" to your class. The video will introduce the concept of outside and inside with some examples and questions. Pause the video when necessary to check your students' understanding and ask them to repeat after the narrator. You can also ask them some questions based on the video. For example, "What is outside the circle?" or "What is inside the square?"
- Practice: After the lesson, give your students some practice worksheets on “outside and inside.” You can find some free worksheets on the com website or create your own. You can also play some games with your students to reinforce the concept. For example, you can play "I Spy" with outside and inside clues. For example, "I spy something outside the window" or "I spy something inside the closet."
-
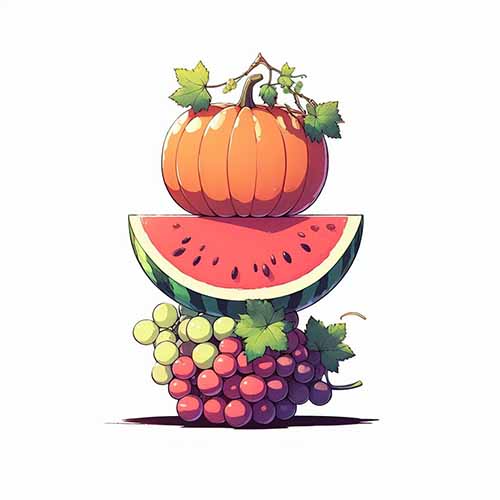
Top / Middle / Bottom: How to prepare, present, and practice the concept
In this lesson, you will teach your students how to identify and describe the position of objects as top, middle, or bottom of other objects. You will need a projector or a smart board to show the video "Top, Middle and Bottom" to your class.
- Prepare: Before the lesson, review the meaning of top, middle, and bottom with your students. You can use some real objects or pictures to demonstrate the concept. For example, you can show them a stack of books and ask them to point out which book is on the top, which is in the middle, and which is on the bottom. You can also ask them to use the words top, middle, and bottom in sentences. For example, "The star is on the top of the tree" or "The button is in the middle of the shirt."
- Present: During the lesson, play the video "Top, Middle, and Bottom" to your class. The video will introduce the concept of top, middle, and bottom with some examples and questions. Pause the video when necessary to check your students' understanding and ask them to repeat after the narrator. You can also ask them some questions based on the video. For example, "What is on the top of the cake?" or "What is in the middle of the flower?"
- Practice: After the lesson, give your students some practice worksheets on “top, middle, and bottom.” You can find some free worksheets on the com website or create your own. You can also play some games with your students to reinforce the concept. For example, you can play "Memory" with cards that have pictures of objects in different positions. For example, a card with a bird on the top of a tree and a card with a bird in the middle of a tree. Ask your students to find the matching pairs and say their positions.
-
Left / Middle / Right: How to prepare, present, and practice the concept
In this lesson, you will teach your students how to identify and describe the position of objects as left, middle, or right of other objects. You will need a projector or a smart board to show the video "Left, Middle and Right" to your class.
- Prepare: Before the lesson, review the meaning of left, middle, and right with your students. You can use some real objects or pictures to demonstrate the concept. For example, you can show them a row of cups and ask them to point out which cup is on the left, which is in the middle, and which is on the right. You can also ask them to use the words left, middle, and right in sentences. For example, "The car is on the left side of the road" or "The pencil is in the middle of the desk."
- Present: During the lesson, play the video "Left, Middle, and Right" to your class. The video will introduce the concept of left, middle, and right with some examples and questions. Pause the video when necessary to check your students' understanding and ask them to repeat after the narrator. You can also ask them some questions based on the video. For example, "What is on the left side of the flag?" or "What is in the middle of the face?"
- Practice: After the lesson, give your students some practice worksheets on “left, middle, and right.” You can find some free worksheets on the com website or create your own. You can also play some games with your students to reinforce the concept. For example, you can play "Bingo" with cards that have pictures of objects in different positions. For example, a card with a banana on the left side of a plate and a card with a banana in the middle of a plate. Ask your students to mark their cards when they hear their positions.
Conclusion
This page shows you how to use MathSkills4Kids videos to teach positions to your pre-K and kindergarten students. We hope you have found these lesson plans valuable and easy to follow. MathSkills4Kids videos are a great way to make your math lessons more fun and engaging for your students. They will help them develop their spatial awareness and mathematical reasoning skills.
Thank you for reading this page on how to teach positions to pre-K and K students using MathSkills4Kids videos. We hope you found it helpful and informative. If you have any questions or feedback, please contact us. Moreover, do not forget to subscribe to our channel for more fantastic math videos for kids!
Please CLICK THE SHARE BUTTON to allow others to benefit from this content!
Happy teaching!